I think I can finally see an end in sight for the seemingly never ending list of Uni work I have! I’ve finished my CAD drawings which means I can now use them to finish my other projects off! Yes, my Uni thinks it’s helping us by giving us “overlapping projects” but really it just annoys us because we end up repeating ourselves ten times. I suppose it is good that we only have to do one set of drawings though…
I’m now past caring if they like my design because they changed it so many times I just got fed up. By week 11 we were meant to be developing our ideas, but they’d say one week that they really liked our design then the next week when we’d developed it and wanted their help they’d then change the entire thing and decide they didn’t like your old design. This happened to me three times and I know I’m not the only one. I was talking to friends and it happened to them too, so we all got fed up and thought stuff it, we’re sticking with the last thing they decided.
I can’t believe how much my design has changed, I’m designing an International Food Market, now I’m sorry, but markets are kind of tried and tested, they’ve been around for centuries and they haven’t really changed, so excuse me if I’m not thinking “outside the box” enough. My design is no longer a place I’d like to visit, I’d find it annoying and overwhelming, but because it’s different with curved walls and loads of coloured glass and lights, my tutors love it.
When I think of a market, I think of a loud, happy environment where people are exchanging knowledge and haggling prices down, they usually follow the same kind of layout, rows of stalls etc. According to my tutors that’s not right and we should all be in some kind of Alice in Wonderland crazy world. That was what they actually suggested to one of my friends who wanted to design a Food Theatre…
When I think of a Food Theatre, I think of demonstrations which I find really interesting because I’m in love with cooking and baking, but they suggested making it like a Mad Hatter’s tea party. Let’s just say it didn’t go down too well with my friend…
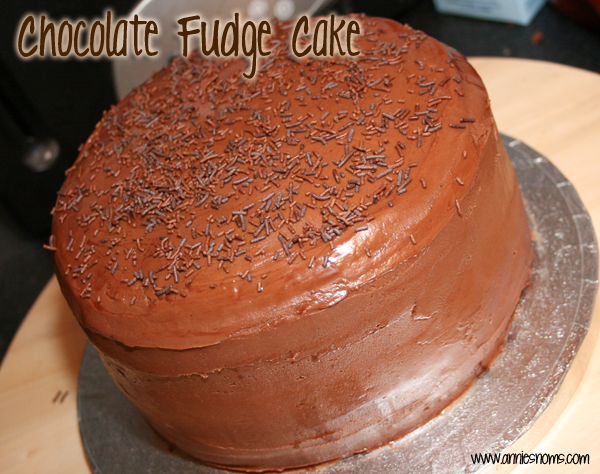
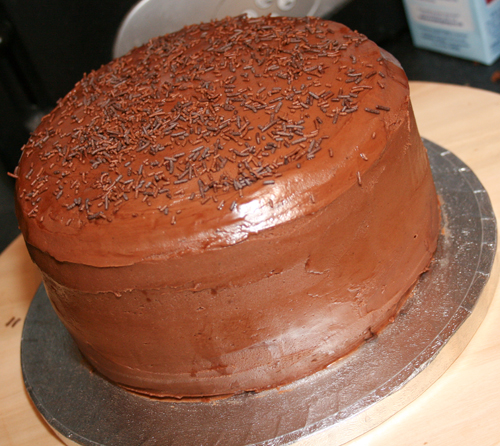
Anyway, before I was flattened by a mega pile of Uni work I made this chocolate fudge cake for my boyfriend’s Mum’s birthday. It was a lovely cake, but the frosting was incredibly sweet, like biting in to pure sugar. I quite liked it, but if you don’t like biting into pure sugar, I’d probably use a different frosting. Boyfriend’s Mum thought it was too sweet and so did he. I’d make the cake again, but I’d definitely change the frosting so it’s more to everyone’s tastes since I’m not going to sit there and eat the whole thing myself 🙂
Makes two 8 inch round layers
Frosting makes enough to sandwich the cakes together and frost the top and sides.
Both recipes from The Fannie Farmer Baking Book
Ingredients for the cake:
> 3oz dark chocolate
> 2 cups plain flour
> 1tsp bicarbonate of soda
> 1 1/2 cups sugar
> 1/3 cup butter
> 1 cup sour cream
> 2 eggs
> 1tsp vanilla
> 1/4 cup hot water
Ingredients for the frosting:
> 6oz dark chocolate
> 1 stick (113g) butter
> 4 cups icing sugar
> 2tsp vanilla
> 1/2 cup double cream
> Chocolate sprinkles to garnish (optional)
Method:
> Preheat the oven to 180 degrees C. Grease and line two 8 inch cake tins.
> Place the chocolate in a heatproof bowl and melt until smooth. I always do this in the microwave, but if you prefer place over a saucepan of simmering water.
> Place the melted chocolate to one side to cool slightly.
> Sift the flour, bicarb and sugar in a large bowl or the bowl of your stand mixer.
> Add in the butter and sour cream and then beat until light and fluffy, about 1 minute.
> Add in the melted chocolate, mix until combined.
> Add in the eggs, vanilla and hot water and mix until well combined and smooth.
> Divide the batter between the two cake tins and then place in the oven for 30-35 minutes until an inserted skewer comes out clean.
> Leave to cool in the cake tins for about 30 minutes before transferring to a wire rack to cool completely.
> Once cooled it’s time to make the frosting, place the chocolate and butter in a heatproof bowl and melt together. Again I prefer using the microwave, but you can place over a saucepan of simmering water.
> Once the chocolate is melted leave to cool slightly. Place the sugar, vanilla and cream together in a large bowl or the bowl of your stand mixer. Beat together until light and fluffy, about 2 minutes.
> Add in the chocolate mix and mix until well incorporated, about 1 minute on med-high speed.
> Place a small amount of frosting on a plate or cake board, whatever you’re placing the cake on.
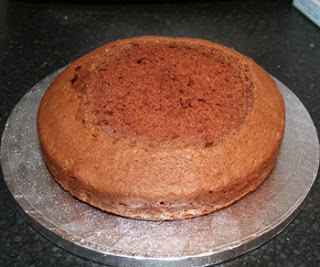
> Level off the cakes using either a serrated knife or a cake leveller. and place one bottom side down onto the cake board or plate.
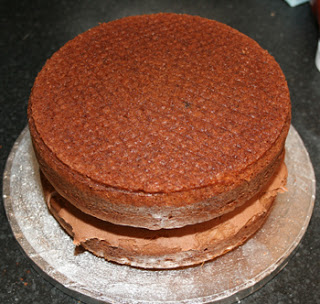
> Spread enough frosting over the cake to cover it and then place the second layer bottom up on top of the frosting so you have a level top.
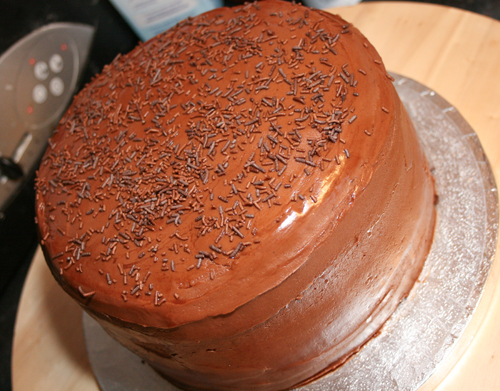
> Cover the cake in frosting, there will be some leftover, but not much. Use a flat spatula for the sides and an angled one for the top of the cake. A handy tip is to dip the spatulas in warm water when you want to smooth the frosting for the final time, it gives a much smoother finish.
> Garnish with sprinkles if desired.
> Will keep in an airtight container in the fridge for up to 3 days.
Enjoy 🙂
Entered into What’s Cooking Wednesday at Buns In My Oven, Thursday’s Treasures at Recipes For My Boys and Foodie Friends Friday

