Annie's Noms

Dessert with a sprinkle of beauty.

  • Home
  • About
    • Why Food Blogging?
    • Contact
    • FAQ
  • Blog
  • Recipes
  • Beauty
  • Conversions
    • Cup to Gram Conversions
    • UK/US Substitutions
    • Oven Temperatures
  • Privacy Policy

My Favourite Brownies in the World!

4.6.12 By Annie N

We’ve actually got off our bums and started tidying the house today πŸ™‚ The spare room is almost clear. I must just say, this isn’t all my mess! My boyfriend is what you might call a hoarder, not really bad, but still a hoarder and when I moved in you could barely walk into the spare room. However, I’ve promised him that once the house is tidied properly and he’s sorted through his stuff, I will keep it tidy. It’s merely the fact that I don’t know where he wants stuff so don’t want to go through it all, otherwise I’d have tidied up months ago.

We’ve also chosen all the paint colours for the house and bought them. I’m so excited, is that sad? My Dad’s a builder and I helped him at weekends when I was growing up and I’m studying Interior Design at Uni so I’m interested in houses, but I’m really happy that I have a new project and I get to decorate the house. We’ve kept it quite neutral, apart from the kitchen where I won and got the green I wanted πŸ˜€ It’s not too bright, but it’s green and I love it πŸ™‚ So today’s jump is the fact I’m jumping into a new project!
So once we’ve finished tidying, I’ll be decorating the house. May even post some pictures along the way… But back to today.
These brownies are fabulous. Fact.
They are gooey and so tasty. I only use Green and Blacks cocoa and chocolate for this as they really make a difference. I found this recipe years ago in an old kids cooking book in a library. I don’t even remember what it was called, I just jotted down the recipe and went off home to make them. We all fell in love with them instantly and they’ve become a firm favourite.
Another bonus – they’re really easy!
You will need:
> Brownie tin (I use a 20cm x 20xm square tin so you get a good thick layer of brownie)
> 3 bowls, including 1 glass/microwave proof
> Sieve
Print
Makes 9-12 depending how large you cut them
Ingredients:
> 90g plain chocolate (best quality you can get)
> 150g unsalted butter
> 125g plain flour
> 25g cocoa
> 1/2tsp baking powder
> Pinch of salt
> 300g light brown sugar
> 1tsp vanilla extract
> 2 eggs
Method:
> Preheat the oven to 180 degrees C and line the cake tin.
> Break the chocolate up and place it into a glass or microwave proof bowl. Add the butter to the same bowl.
> Place the chocolate and butter in the microwave and heat for 30 seconds, stir and repeat, then go down to 10 seconds when it’s almost melted. Repeat this until the mixture is entirely melted and then place to one side to cool.

> If you prefer, you can heat a saucepan of water, making sure the bowl doesn’t touch the water, and heat until everything is melted. For speed, I always microwave and I’ve never burnt my chocolate, it’s all about how you do it. Don’t just put it in for 2 minutes and leave it because it will burn.
> In a large bowl, or the bowl of your stand mixer, place the sugar, eggs and vanilla extract.
> Mix until light and smooth.
> In a separate bowl, sift the flour, cocoa, baking powder and salt together.
> Add into the sugar and egg mixture.
> Mix until well incorporated.
> Now add the chocolate and butter mixture to your large bowl. I use a rubber spatula to make sure I get all of the chocolatey goodness out of the bowl!
> Put the mixer on low and mix until everything is combined. Don’t be tempted toΒ over mix and you don’t need to turn the mixer on high.
> Place the mixture into the tin.
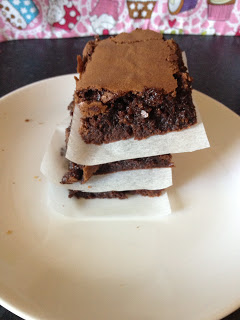
> Bake for 22-25 minutes. A skewer should not come out clean, but with some crumbs still stuck to it. This is the key to a gooey brownie, not overcooking them! It should be lighter brown on top and a bit cracked, but when you put the skewer in, it comes out darker.
> Leave to cool in the tin for 20 minutes. Then take out and leave to cool on a wire rack completely.
> When cooled, run a knife under the hot tap and then dry before slicing. By using a hot knife, you hopefully won’t get the brownies breaking up too much and sticking to the knife. Cut into 9 or 12.
> Will keep in an airtight container for about 3 days. (They also taste fabulous when they’re still a bit warm if you can’t wait!!)

Favourite Brownies

Enjoy! πŸ™‚

Share this:

  • Facebook
  • Twitter
  • Pinterest

Filed Under: Brownies, Chocolate, Recipes Tagged With: brownies, chewy, chocolate, dark, favourite, rich, soft

« Food Blogging is Therapy for me…
1 Room down, 6 or so to go… »
Meet Annie
Recipe Developer, Food Photographer, Writer, lover of dessert and beauty! Photo
More about me...
  • Facebook
  • Instagram
  • Pinterest
  • RSS
  • Twitter

Categories

Archives

Popular Posts

Kiko Instamoisture Foundation Review and Wear Test | Annie's Noms

Kiko Instamoisture Foundation Review and Wear Test

Rich, sweet caramel sandwiched between two layers of buttery shortbread; these little Caramel Crumb Bars are just perfect for when you need a sweet fix!

Caramel Crumb Bars

Thick, fudgy double chocolate brownies filled with crushed Mint Oreo's. A super decadent festive treat the whole family will love!

Mint Oreo Brownies

Some Updates

This easy Chocolate Chip Biscoff Danish Braid is ready in 30 minutes and tastes utterly divine. Rich chocolate cuts through the sweet, spicy Biscoff to create a gooey centre to the crisp, flaky puff pastry braid. A heavenly dessert or super decadent breakfast!

Easy Chocolate Chip Biscoff Danish Braid

Chewy Lime and Vanilla Cookies

About

Annie is a self-taught baker, recipe developer and food photographer, who has an obsession with dessert and beauty! More…

  • Facebook
  • Instagram
  • Pinterest
  • RSS
  • Twitter

Recent recipes

This Vegan Lemon Coconut Layer Cake combines a soft, flavourful lemon sponge, whipped coconut vanilla frosting and has a toasted coconut coating on the sides. It is the perfect cake for a birthday or Spring gathering.
This Vegan Lemon Drizzle Cake is as delicious as the regular version, super easy to make and perfect to devour with your afternoon coffee. You really would not know it's vegan!
This Festive Spiced Soda Bread is a Christmassy twist on a classic Irish soda bread. Full of currants, sultanas, raisins, mixed peel and cranberries, it's flavourful, soft and perfect with a good serving of butter!

Copyright © 2025 Annie Ngai - Privacy Policy


Loading Comments...